Google Meet guide for test users
Google Meet is an online tool for moderated user testing. Below, you will find a step-by-step guide on how to use Google Meet.
PREPARATION
Please make sure that everything is set up before the test begins. To do so, use your confirmation email to check which device the test will be conducted on and set up the tool on said device (desktop/smartphone), using this step-by-step guide. This isn’t complicated, but please reserve some time for it.

HOW TO LAUNCH GOOGLE MEET ON YOUR DESKTOP
To use Google Meet on a PC or laptop, you must have one of the following browsers installed:
- Google Chrome (download here: https://www.google.com/chrome/)
- Mozilla Firefox (https://www.mozilla.org/firefox/new/)
- Microsoft Edge (https://microsoft.com/edge)
- Apple Safari (https://support.apple.com/en_US/downloads/safari)
If you want to use Internet Explorer, then you will need the current version of the Google Video Support Plugins.
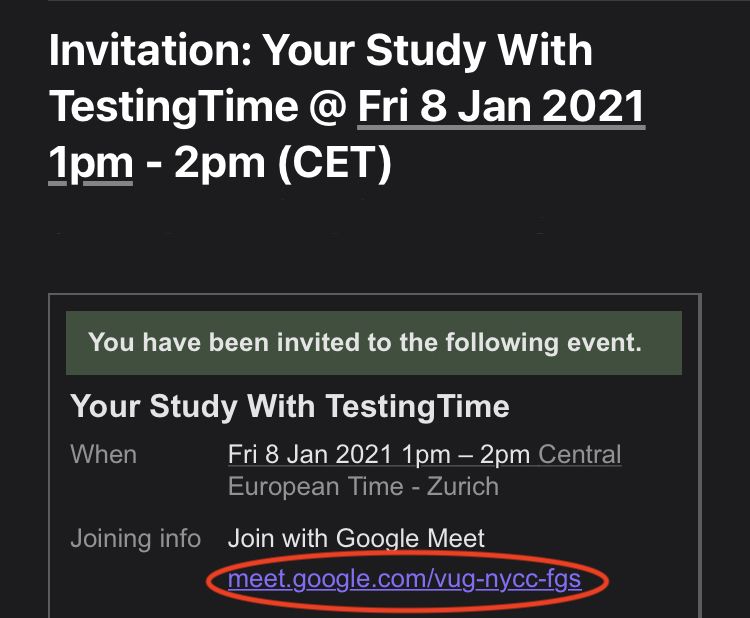
1. Click on the Meet link in your confirmation email …
… which may look like this: http://meet.google.com/vug-nycc-fgs. Alternatively, you can enter the link or the code (the last part of the link, in this case “vug-nycc-fgs”) on the Google Meet launch page.
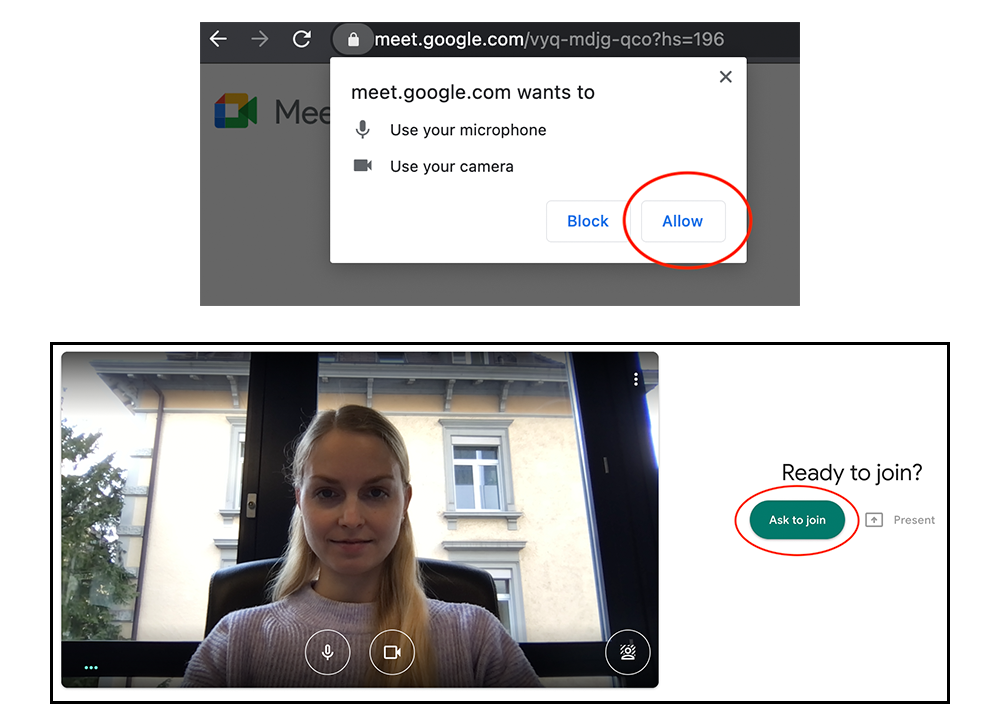
2. Before you use Meet, you must grant the tool access to your computer’s camera and microphone.
To do this, click on “Allow”.
3. Once you have granted access to your camera, …
… you will be able you see yourself in the video window. Depending on the meeting settings, you will either be able to join immediately or you will enter a waiting area from which your study leader will accept you into the meeting. In the meantime, you can make a “test call” (see next step).

Test call: Are my audio and camera working?
Before entering the conference room, click on the icon with the three vertical dots in the video window and then click on “settings”. There, you can test whether your audio and video are working.
If everything works, then you can join the conference by clicking on “Ask to join”.
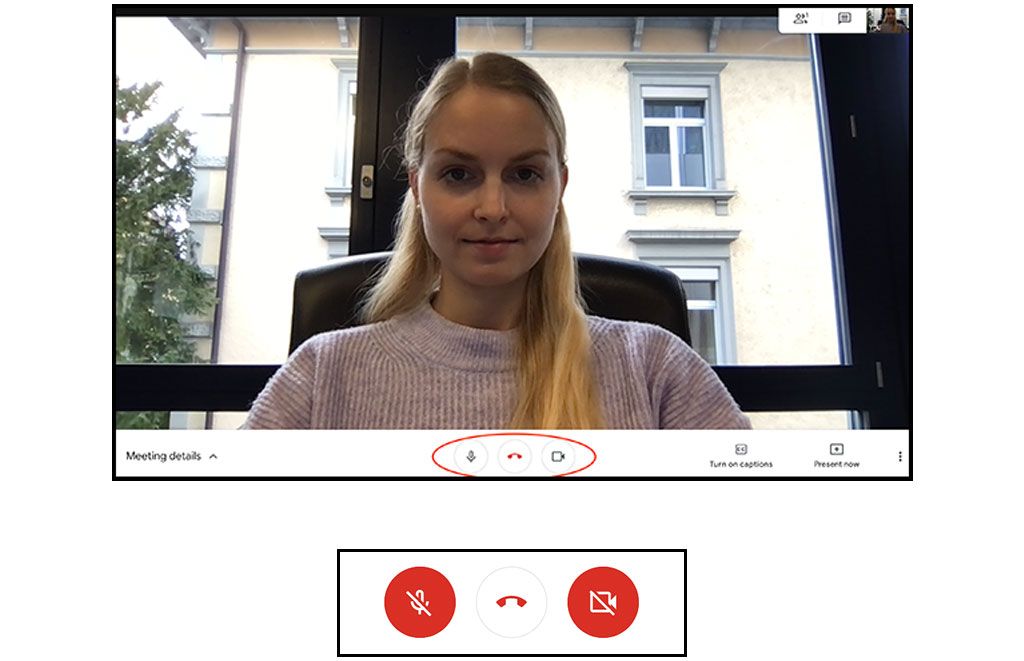
4. You are now in the conference room.
There, the researcher is either already waiting for you or you will have to wait shortly before he or she enters.
During the video conference, you will have different options at your disposal:
- Click on the microphone to switch it on or off.
- Click on the camera to switch it on or off.
Once they are switched off, the icons turn red.
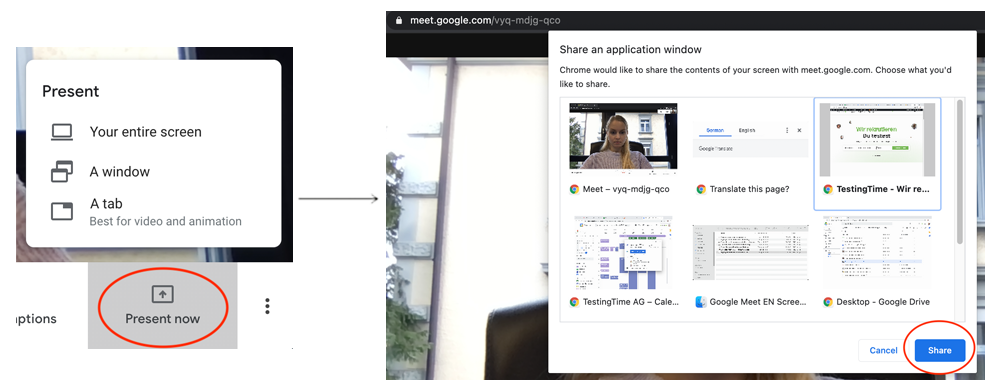
5. During the study, the researcher will ask you to share your screen.
You can do this by clicking on “Present now” in the bottom right. A new menu will open where you select “A window” if you want to share your current browser window (in rare cases, you will have to select “Your entire screen” if you want to share more than just the current browser window). The researcher will let you know which option makes most sense for the given study.
In the next step, you will see an overview of all your open windows. Select the window that you would like to share (Google Meet). Then, click on “Share”.
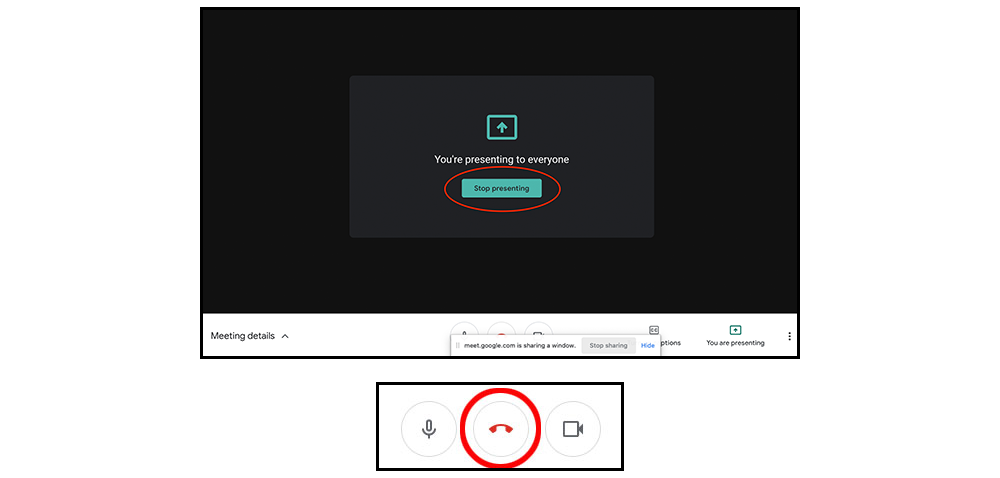
The researcher will tell you when it is no longer necessary to share your screen. You can then click on “Stop presenting” and your screen will no longer be visible to the other person.
6. When the test is completed and you would like to leave the conference, click on the red phone icon.
This will end the call.
HOW TO LAUNCH GOOGLE MEET ON YOUR SMARTPHONE
Using your smartphone, you can either join a call via the Gmail app or the Meet app.
1. If you already have a Google account, then you have probably already installed the Gmail app on your smartphone.
Alternatively, you can just install the Meet app, which will only take a minute (link to the app in the Playstore, link to the app in the App Store).
2. Once you’ve got one of the two apps, please click on the Meet link in your confirmation email on your smartphone.
The link may look like this: http://meet.google.com/vug-nycc-fgs.
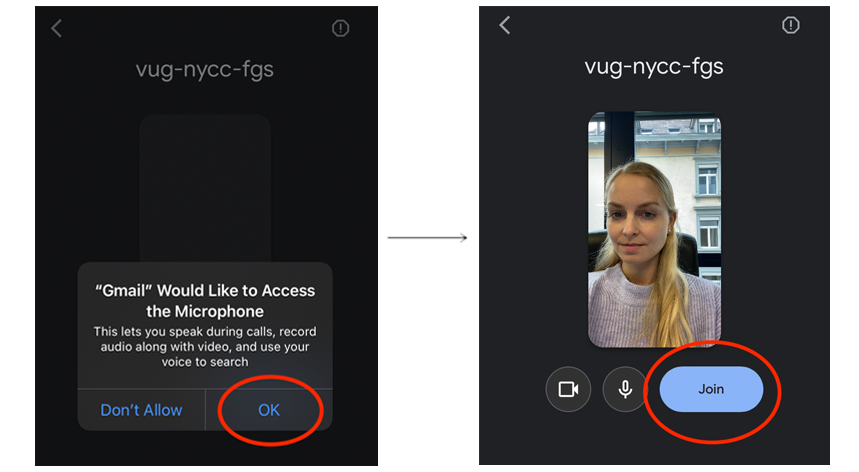
3. You will then be automatically redirected to the Gmail or Meet app.
If you have both apps installed, you will be able to choose which you would like to use. Google will also ask you which email account you would like to use. If you do not have an account yet, then you can create one at this point.
4. You will then be brought to the meeting’s launch screen.
If you are using the app on your device for the first time, then you will first have to grant access to your camera and microphone. This will make it it possible to stream images and videos during the conference and you will be able to talk to the researcher. To do so, click on “OK.”
You are now ready to join the meeting by clicking on “Join”.

5. You have now joined the conference room …
… where the other participants are either already waiting for you or you’re the first one. In that case, just wait for a moment before the researcher arrives.
6. Your contact will ask you to share your screen.
To do so, tap on the icon with the three vertical dots on the bottom right.
This will open a menu. Please select “Share screen” and then “Start Broadcast”.
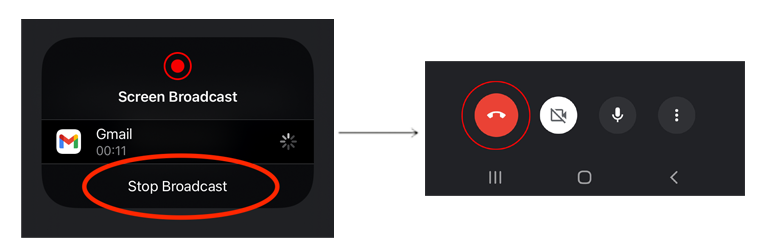
Once you have completed the last task that the researcher has given you, you have finished the test. You can now stop sharing your screen by tapping on “Stop Broadcast”.
7. You can leave the conference by tapping on the red phone icon at the end of the conference.
Do you need more help?
Go to the Google Meet troubleshooting page.
Test new products and services: Share your opinion & get paid for it.
YOU’RE NOT EARNING MONEY AS A TESTER YET?